How to build a Cathedral Façade
By Jeff & Chris Davis
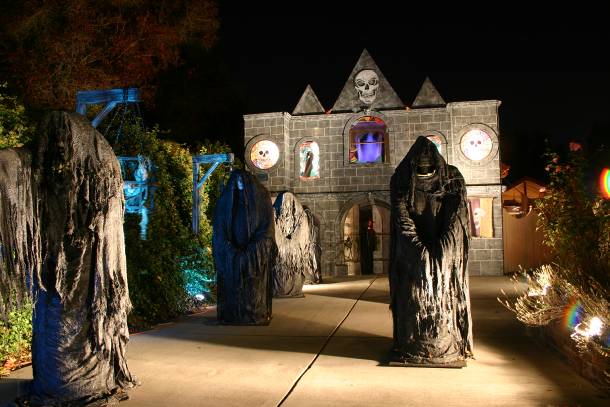
We have been doing a haunted graveyard display in our front yard for almost 10 years. Each year we try to add more and more to it. As we got more detailed with our display be have become increasingly focused on our theme. We had built a bunch of Monster Mud Monk-like figures that line our driveway several years ago. During our planning for 2006 we talked about why Monks would be in a Graveyard. We decided that the only reason monks would be there was if there was a church nearby. In 2006 we attended HauntX and HAuNTcon and got some great ideas. One of the things we learned was from Bad Boys Scenic Design of Terror on the Fox fame. They showed how entire scenes could be done to look like stone out of foam. We started sketching out a design for a cathedral to display as a façade in front of our garage. We knew that the only way we would be able to afford to do this on a large scale was if we could construct it as if it were a theater set. Since we knew that no one was going to be walking near it and that it was going to be viewed from a distance the set construction concept would work for us.

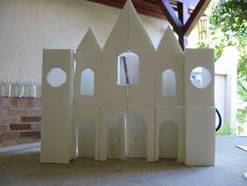
We first had to decide if this was something we could build in one summer with a small crew and afford to build it. We started by building as scale model of our design cut out of foam board. We cut out small rectangle pieces that represented a 4x8 wall and then cut the windows and arches out of each piece and then glued the whole thing together. After a couple of minor changes we had our design.
After building the scale model it was easy to figure out that we were going to need 25 4x8 sheets of foam to build the entire thing. We normally use 2” foam for all our tombstones and monuments but at over $20 a sheet this was going to be expensive. So we considered using 1” foam instead which is half the cost.
Using a common soft flat set building technique the frames of the walls were constructed using 8’ 1x3 lumber using keystones to tie the joints together. The entire frame was fastened together with 1 inch stapes using a pneumatic staple gun.
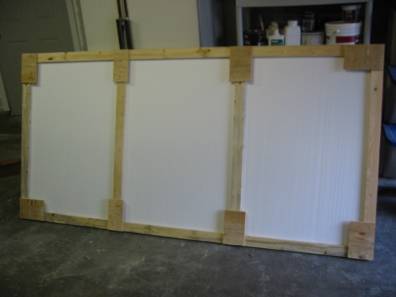
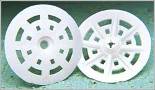
The 1” foam was glued to the frame and then held in place with a special 1-3/4” white plastic round washer from Demand Products Inc.
Knowing that some panels would have windows or doorways in them the wood frames of those panels were constructed with these areas left open.
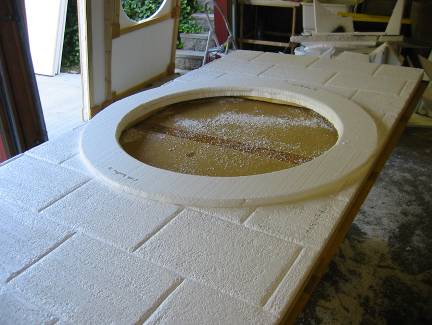
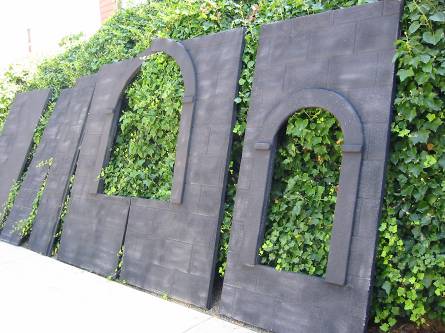
We stood the panels up in place and connected them with small 5” ½ plywood squares at the top and bottoms. Once the panels were laid out in place the doorways and windows were drawn and then cut out. We then drew the stone wall design on the panels. We used a thin plywood square as a template. We used a smaller template for the 2nd story walls to create a forced perspective (like they do in Disneyland).

Once all the patterns were drawn and the openings cut out the panels were taken apart and individually textured. Moldings were cut out of the scrap pieces to go around the doors and windows. Using a dremel tool with a polishing bit the grout lines were made in the foam. Then using a scouring pad the texture of the stone was made and then a heat gun was used as the final touch. We applied a little rubber cement over the plastic washers and covered it with the foam debris made by shaping. After painting they couldn’t be detected.
The foam moldings were textured using the same method and then glued to the panels using a polyurethane construction adhesive.
All of the panels were sprayed with a coat of flat black exterior latex paint.
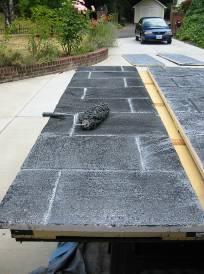
Each panel was then hand painted. The grout lines were painted on first with a grey/white color and then the entire panel is painted using separate coats of different shades of grey exterior latex paint. The paint is applied using a sea sponge roller. We found that this is much faster than hand painted with a sea sponge. When using the roller the paint is applied in random directions so no roller patterns are created.
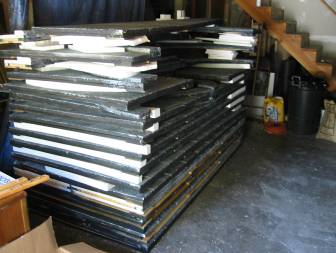
Once all the panels were painted they were stacked up and ready to be assembled.
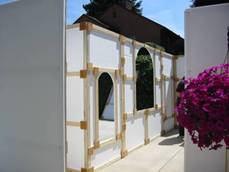
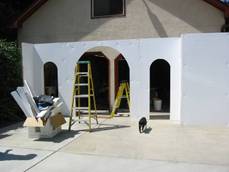
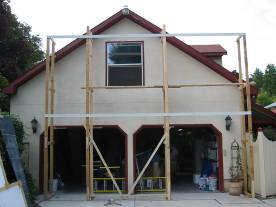
Since we didn’t want to waste a lot of time figuring out how to setup the Cathedral in October when we setup we decided to give it a trial run a month earlier. We constructed a simple 2x4 frame that all the panels would hang on. The frame was attached directly to the garage. This created a simple scaffolding for someone with no fear of heights and monkey-like abilities to help attached the panels.
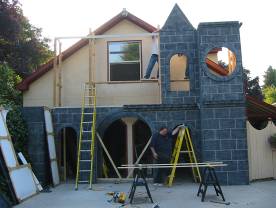
The bottom panels were attached first. Then the molding pieces were set in place at the top of each of the lower panels. Then the upper panels were attached. Molding was placed on top of the upper panels and then the peaks were put into place. After it was all setup we took it down and stored it until our setup in October.
There were a lot of details that were created throughout the building process to add to the look of the Cathedral.
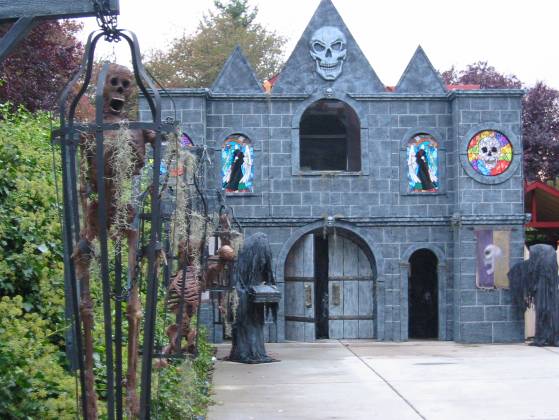
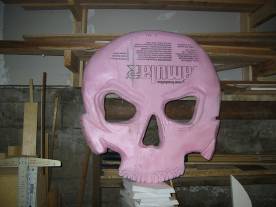
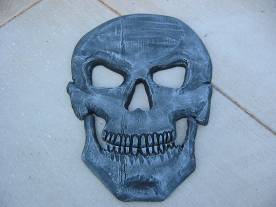
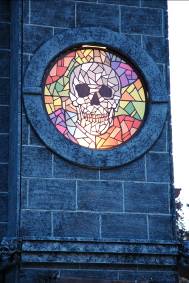
The skull at the top peak was carved out of pink foam. We traced a skull onto the foam using a tracing projector and then cut it out. We then carved out the detail and textured it. Once complete we painted it and then glued it to one half of the top peak so it overlapped onto the other half when the peaks were installed.
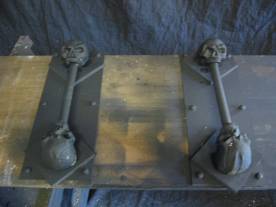
The doors were carved out of pink foam and textured to look like wood. We glued strips of black corrugated plastic on the doors for the metal bands. We used wooden decorative accents for the oversized rivets. We fabricated the door handles out of a couple of rigid foam skulls we made and some 1” dowel glued to a small sheet of masonite.

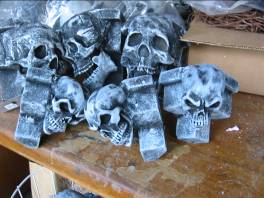
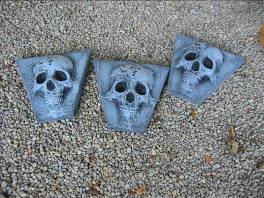
We cast rigid foam skulls and used them for the corner pieces and for the tops of the doors and windows.
The stained glass windows were designed using Adobe Illustrator and then given to a sign printer who printed large stickers and attached them to sheets of Plexiglass. We were fortunate to know a sign printer and they were able to use scrap pieces of plexiglass they had and they did the sticker printing at a very low cost for us.
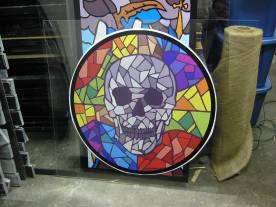
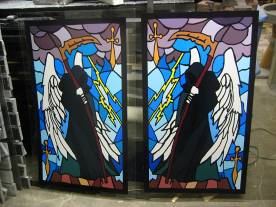
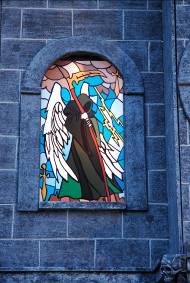
For the 3 foot round windows we used the same skull design we used for the peak. We drew in the lines and then scanned the image and filled in the colors. The Angle of death 2x3 windows were inspired from an image we found and then hand traced and colored. We flipped it to produce two facing images. They were attached to the panels using wood screws through holes drilled in the Plexiglas. We mounted spot lights below them that shown up to light the images.
The final touch was to create a broken window in the main window so our flying crank ghost that we hang in the upper window of the garage would be seen. We had our friends at the sign company make us another sticker of stained glass and put it on clear corrugated plastic. We cut it out and screwed it to the back of the window panel.
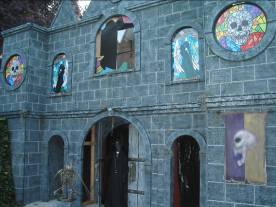
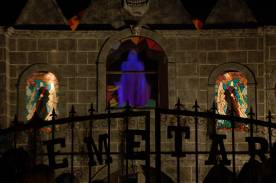
With our monks in the driveway and everything lighted, the Cathedral façade turned out better than we expected.